How to downgrade HP Virtual Connect Flex-10 Firmware
There may be a situation where you need to downgrade your HP Virtual Connect Flex-10 firmware. You may need to downgrade to test/prove an upgrade again, you may have encountered a bug which forces you to downgrade or you may just need a roll back plan for your proposed upgrade.
In order to downgrade HP Virtual Connect firmware, you will need to shut down your HP blade environment as the downgrade procedure requires you to delete the Virtual Connect Domain which can only be done with all servers in all chassis in your Virtual Connect (VC) Domain powered down.
You need to ensure you have the local Administrator password for each Flex-10 module that came on the tag with the Flex-10 module. As you will be deleting the VC domain, any domain/local users created as part of the VC domain will not be available once the domain has been deleted.
You may also need to have a backup of the domain configuration at the version you are downgrading to. This depends on what version you wish to downgrade to as it seems the VC backup file contents change depending on the version. There is an option in the restore to ignore the firmware version but this doesn’t seem to work with all versions so ensure you have a backup before doing any upgrades so you have a configuration to roll back to.
Have the IP addresses and credentials of the OA module in each chassis.
Download the HP Flex-10 firmware version you require which is a .BIN file.
Download the HP BladeSystem c-Class Virtual Connect Support Utility (VCSU) 1.52
http://h20000.www2.hp.com/bizsupport/TechSupport/SoftwareDescription.jsp?swItem=MTX-7fae0fbc49bb4e4aa819292a08&lang=en&cc=us&mode=3&
Install the VCSU, this can be installed to a network drive as it only copies files so may be useful to have it in a shared folder where multiple people can access it.
Copy the Flex-10 firmware .BIN file into the VCSU installation location.
Example: vcfwall310.bin
A useful utility to be able to view live log files is the Windows Server 2003 Resource Kit Tools tail.exe which can be downloaded from:
http://www.microsoft.com/downloads/en/details.aspx?FamilyID=9d467a69-57ff-4ae7-96ee-b18c4790cffd
Copy tail.exe to the VCSU installation folder.
Shut down all VMs
Shut down all Hosts/Servers in the chassis you will be downgrading.
Launch the HP Virtual Connect Manager for the rack.
It’s best to create a VC domain backup before any work.
Navigate to Domain Settings | Backup / Restore
Under Backup Domain Configuration, click Backup Configuration
The backup configuration file will be created from the VC Domain Manager, save it somewhere.
Navigate to Domain Settings | Domain Configuration
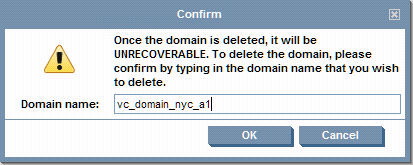
Copy the Virtual Connect Domain Name into the clipboard as you will need this to delete the domain.
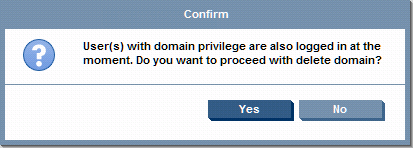
Click on Delete Domain
Click Yes to proceed with domain users logged in
Paste the Virtual Connect Domain Name from the clipboard and click OK
The Virtual Connect Domain will be deleted
You will be logged out from the Virtual Connect Domain and redirected to the IP address of the Flex-10 module that was acting as the VC Domain Manager. This IP address is different from the Virtual Connect Domain IP Address which may be set.
Note down the IP address you are redirected to as you will need it later.
Now the Virtual Connect Domain has been deleted, each chassis is working independently from a Virtual Connect perspective.
Launch a command prompt for each chassis and map a drive to the VSCU installation location.
Run through the following procedure for each chassis:
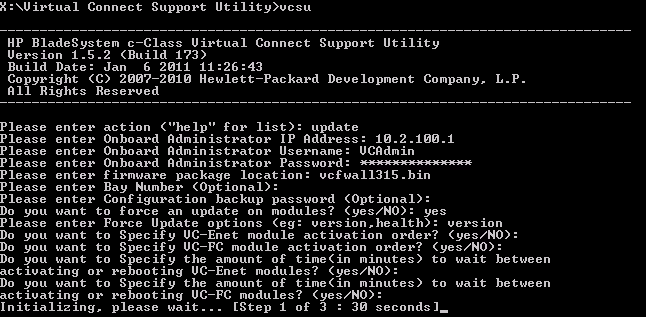
- Launch the VCSU utility, vcsu.exe
- Enter update as the action
- Enter the OA IP Address of a chassis
- Enter the OA Credentials
- Enter the firmware package .BIN file name which you copied into the same location as the VSCU utility.
- Accept the default settings for Bay Number and backup password.
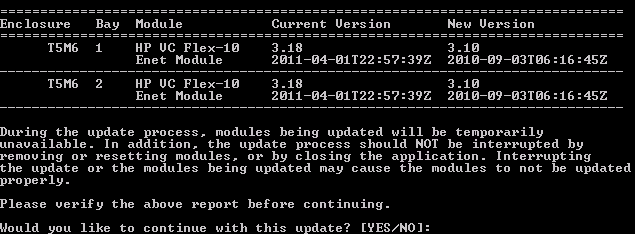
- Enter yes to force an update on modules as you are downgrading.
- Enter version as the Force Update option
- Accept the remaining defaults by pressing enter as you do not need to ensure network failover occurs as the whole environment is shut down.
The VSCU utility will connect to the OA and get information about the Flex-10 modules.
The screen logging is very basic so to keep up with what is going on you can view the log file generated.
Each time the VCSU runs it creates a subfolder in the VCSU installation directory starting with vcsu- where it places its working files and a log file called vcsu.log
Open up another command prompt and navigate to the VCSU installation folder and change directory to the created folder.
Run tail.exe from the folder above pointing to the vcsu.log file using the following command:
..\tail -f vcsu.log
You can now view the log file live.
The firmware package will be extracted.
Once the modules have been identified, enter yes to continue the update
The firmware will be uploaded to the Flex-10 modules and then they will be rebooted (activated).
Once complete, Press Enter to exit the VCSU utility.
As this has now been done on all chassis, your firmware would have been downgraded.
Launch the Virtual Connect Manager connecting to the IP address of the IP address you were redirected to after deleting the Virtual Connect Domain.
Log in with the local Administrator credentials from the shipping tag
The HP Virtual Connect Domain Setup Wizard will launch
Click Next
Enter the OA admin credentials and click Next
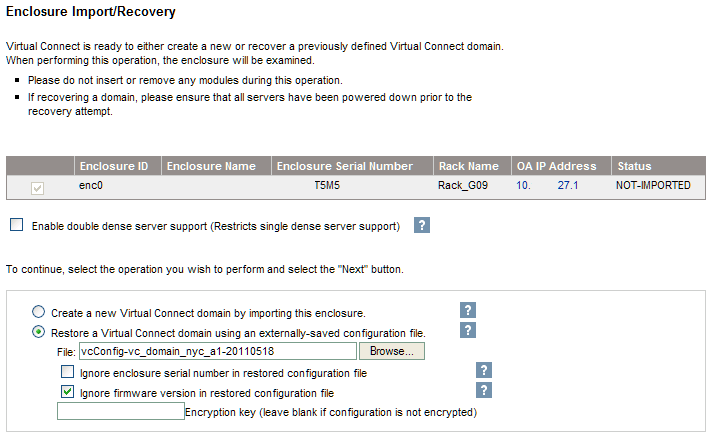
Select Restore a Virtual Connect domain using an externally-saved configuration file
Browse to the backup Virtual Connect Domain file you created before deleting the domain
Check Ignore firmware version in restored configuration file
Click Next
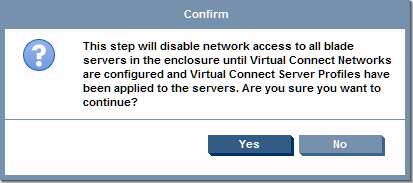
Click Yes to Confirm network access will be disabled
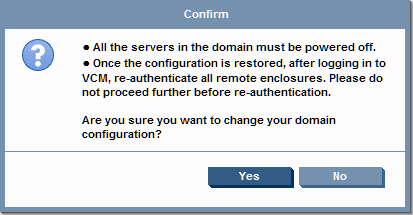
Click Yes to confirm the domain configuration change
The Domain configuration will be restored and you will be logged out.
Once you have been logged out, the page will be refreshed but it may take some time before you are able to logon on while it says Loading, please wait… be patient!
Logon to the Virtual Connect Manager
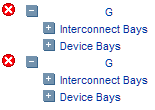
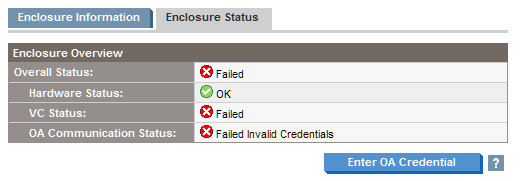
You will see a message saying that the Virtual Connect Manager has lost communication/credentials with the OA, this is because the domain has been deleted and the credentials need to be re-established between the VC modules and the OA.
For each chassis that cannot communicate, click on the Chassis Name and navigate to Enclosure Status
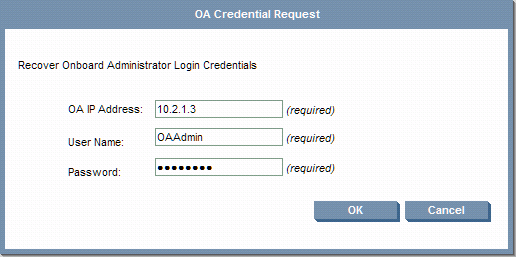
Click on Enter OA Credential
Enter the OA Credentials and click OK
The credentials will be re-established.
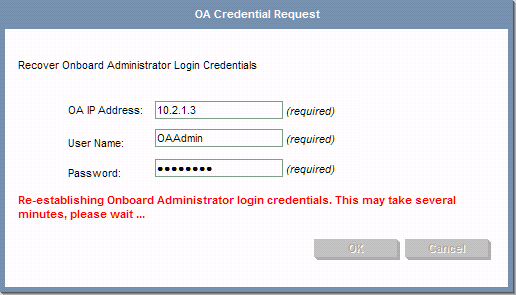
Once all VC modules can talk to their OAs, the restore is complete and you have downgraded the Flex-10 firmware.
Be careful though as there are some issues with previous Flex-10 firmware versions, make sure you follow the advisories and search my other posts to avoid additional issues.
You can then proceed with powering up all blades / VMs.









Awesome article, very helpful!
Drew
I ran into the issue of restoring domain configuration for the downgraded firmware. (Downgraded from 3.30 to 3.18) Got this error message:
http://www.flickr.com/photos/80050932@N06/?uploaded=1&magic_cookie=0b6dc868b9aa1f1fd24af10de8dc9733
A backup of the 3.18 domain configuration was never created.
Is there anything I can do to work around this?
Hi ,
I ran into the issue of restoring domain configuration for the downgraded firmware. (Downgraded from 4.10 to 4.01) Got error message.
I have config backup of 4.10 but i am not able to restore it into the 4.01.
Is there any workaround for the same?
fuck this
the newest version of the VCSU is here;
Version:1.11.1 (3 Aug 2015)
Fixes
Upgrade Requirement:
Recommended – HP recommends users update to this version at their earliest convenience.
http://h20564.www2.hpe.com/hpsc/swd/public/detail?swItemId=MTX_73095810f7af4c70be44dec475#tab1
@Dusty
Seems a bit harsh!