vSphere 5 Certificates: 7 – Replacing the default Update Manager 5 Server Certificate
This is the final post of a 7 part post on managing vSphere 5 Certificates:
- Installing a Root Certificate Authority
- Distributing the root CA certificate to clients
- Creating the default vCenter 5 Server Certificate and including a DNS alias
- Replacing the default vCenter 5 Server Certificate
- Replacing the default vCenter 5 Web Client Server Certificate
- Replacing the default vCenter 5 Inventory Service Certificate
- Replacing the default Update Manager 5 Server Certificate
VMware Update Manager uses a different self-signed certificate to authenticate against vCenter Server which also needs to be replaced. You can use the same vCenter certificate if the Update Manager installation is on the same server as vCenter or create and trust a new certificate using the same procedure with the Update Manager server name if it is on another server.
On the Update Manager Server navigate to the Update Manager installation directory C:\Program Files (x86)\VMware\Infrastructure\Update Manager.
Make a backup copy of the SSL folder.
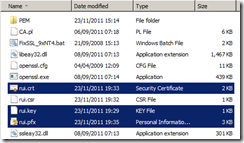
Copy the same rui.crt, rui.key and rui.pfx certificate files you created as part of the vCenter Server certificate process into the SSL folder if Update Manager is on the same server else use the other ones you have created.
Launch the Update Manager Utility which is located:
C:\Program Files (x86)\VMware\Infrastructure\Update Manager\VMwareUpdateManagerUtility.exe
Log into vCenter with an administrative account.
Select SSL Certificate
The steps listed are for creating the certificates and copying the files which have already been done.
Select Followed and verified the steps and click Apply.
The configuration change will be applied.
When complete, you will see a dialog box.
Restart the VMware vSphere Update Manager Service to complete the certificate change.
You can confirm the certificate has been installed successfully by re-launching the vSphere client and ensuring you no longer get any certificate warnings for the vCenter Server and Update Manager (you may still get warnings for other vCenter components and plug-ins which use different certificates).
Once complete you have successfully created your own Root Certificate Authority, deployed the root CA certificate to your clients and created and replaced the default certificates for VMware vCenter, Web Client Server, Inventory Service and Update Manager.


Nice series. Any chance you do an additional article on replacing the default Auto-Deploy certificate as well? The docs are wonderfully lacking on the detailed procedures for this.
To close the loop on my earlier reply, with the exception of the Web Client certificate (which differs only at the end) the process is the same for replacing all these certificates under vCenter 5.1.
After change the certificates with this guide, everything is working fine except the Windows XP clients that couldn´t connect with the vCenter 5.0 with the vClient 5.0 showing errors about connection failed, too long to respond, system out of memory… any idea? We delete the regystry key http://kb.vmware.com/selfservice/microsites/search.do?language=en_US&cmd=displayKC&externalId=1010955 but after reapliying the cert the issue is still there, any idea?