vSphere 5 Certificates: 1 – Installing a Root Certificate Authority
Updated: 27 February 2012 to include vCenter 5 Web Client Server and vCenter 5 Inventory Service
This is the first part of a 7 part post on vSphere 5 Certificates:
- Installing a Root Certificate Authority
- Distributing the root CA certificate to clients
- Creating the default vCenter 5 Server Certificate and including a DNS alias
- Replacing the default vCenter 5 Server Certificate
- Replacing the default vCenter 5 Web Client Server Certificate
- Replacing the default vCenter 5 Inventory Service Certificate
- Replacing the default vSphere Update Manager 5 Server Certificate
The posts will take you through building your own certificate trusting infrastructure and distributing the certificates, creating your own vCenter and Update Manager certificates which can also include DNS aliases and all the steps required to put it all together.
Managing certificates is one of the aspects of a virtualisation environment that is often overlooked or even avoided as it is seen as a hassle and having secure certificates is often not a core requirement of your virtualisation infrastructure.
However there are reasons why you may need to have certificates installed within your environment. Many financial companies, government departments or security sensitive installations require trusted certificates to be installed due to legal regulatory requirements. Public cloud providers need to ensure they are exposing their cloud in a trusted and secure manner and certificates is a part of that. Even if you only have an internal facing infrastructure, Citrix XenDesktop requires the vCenter certificate be installed on the Desktop Delivery Controllers for https access to work.
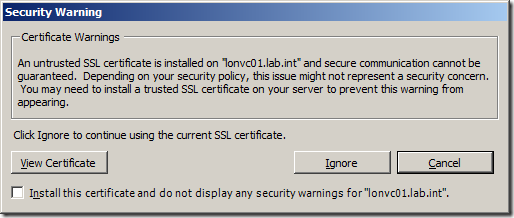
Even if none of these apply to you, surely the pesky certificate warning that every vSphere Client user gets when launching the client is annoying enough to do something about it!
You can click on Install this certificate and do not display any security warnings but this would bypass any certificate checking and each client would need to do this individually.
If you click on View Certificate you can see the certificate is issued by itself and is not trusted by a CA Root Certificate Authority. This means the client has no way of knowing for sure whether they are actually connecting to the vCenter that they expect as someone could install another vCenter with the same name and generate another certificate that would make you think you are connecting to a different vCenter Server.
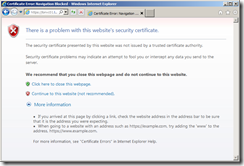
You can also check the certificate that is issued by pointing your browser to the https:// web server address of your vCenter server (in my example https://lonvc01.lab.int/), and seeing the security certificate warning message,
In order to resolve this you need to have a certificate generated that is issued to the vCenter Server and is also trusted by a CA Root Certificate Authority. A CA Root Certificate Authority is the top level authority in the certificate tree chain which verifies that the certificate issued to the vCenter Server is a trusted certificate and represents the vCenter you think you are connecting to. There are commercial CA Root Certificate Authorities such as Thawte, VeriSign or Entrust, which for a fee will create and verify certificates for your servers. Your company may have its own CA Root Certificate Authority internally or you may create one yourself to trust your own certificates.
Certificates are held within your browser and can be viewed:
Internet Explorer
Tools | Internet Options | Content Certificates
Firefox
Tools | Options | Advanced | Encryption | View Certificates
Google Chrome
Options | Under the Bonnet | Manage Certificates
You can view the Trusted Root Certification Authorities which are the top level of trust in a certificate chain. Many of the commercial Root CA Certificates are installed by default within your browser.
If you want to manage your own certificates internally you can install a Windows Servers role called Active Directory Certificate Services which can act as your own CA Root Certificate Authority and start trusting your own certificates and get rid of those pesky certificate warning messages.
Installation
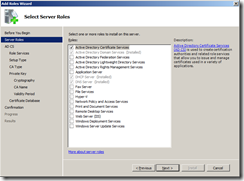
To install the Active Directory Certificate Services Role on Windows 2008 R2, launch the Add Roles Wizard.
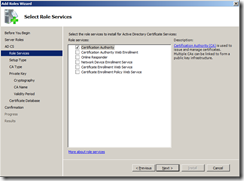
Select Active Directory Certificate Services
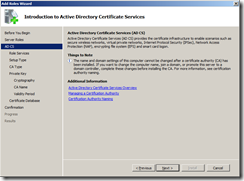
Select Certification Authority. If you want to allow people within your organisation to manage certificate requests using a web based system you can install Certification Authority Web Enrolment which requires the addition of the IIS role but for the sake of simplicity we will manage certificates with the MMC snap-ins.
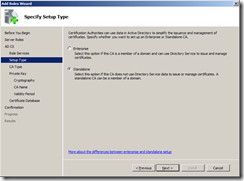
Select Standalone as we don’t need to manage certificates using AD.
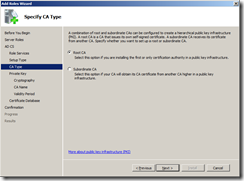
Select Root CA
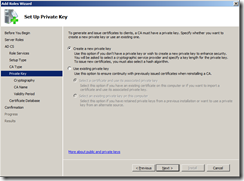
Select Create a new private key as we want to start with a new CA
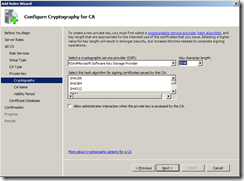
You can keep the default cryptographic service provider, key character length and hash algorithm unless you have a legal requirement where you may need to install the CA with different security settings.
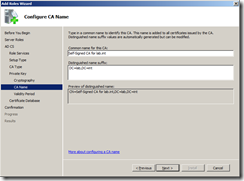
Give your CA a common name, this will be visible within the certificate trust chain so make it something understandable so your clients can check the certificate is trusted correctly.
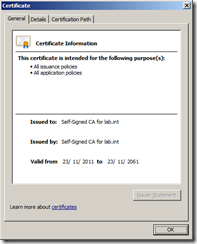
As my domain is called lab.int, I called my CA common name Self-Signed CA for lab.int
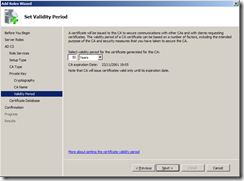
I set the validity period to 50 years, whatever you choose, make it longer than the validity of the subordinate certificates you will trust.
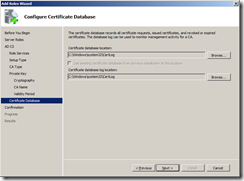
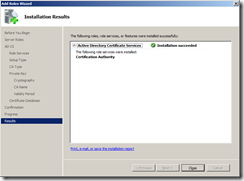
You can complete the rest of the installation wizard with default settings.
Once the Active Directory Certificate Services Role has been installed, you can view the Root CA certificate that has been created.
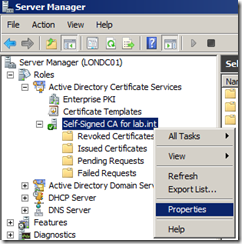
Launch Server Manager and navigate to Roles | Active Directory Certificate Services and you will see a certificate has been created called Self-Signed CA for lab.int.
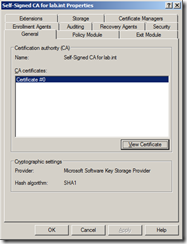
Right click and select Properties and then click on View Certificate which will show you the certificate details.
You have now installed a Root Certificate Authority.
Part 2 will show you how to Distribute the CA root certificate to all your clients.



Recent Comments